How to Handle Common Garage Door Hinge and Spring Issues
When it comes to garage doors most people know about the opener, the panels and the remote. That’s about it. But a typical garage has dozens of components and if any one of them goes wrong it could spell trouble. Garage springs are very tightly wound, heavy duty springs that are responsible for all the heavy-lifting in opening and closing garage doors. They are under an immense amount of tension which offsets the weight of the door, making sure it opens and closes smoothly. Because of the monumental amount of work they do, it’s no surprise that they get worn out over time. When your garage door starts acting funny - like stopping or pausing during its opening/closing cycle, appearing crooked, or closing too hard - chances are, the springs could use an adjustment.
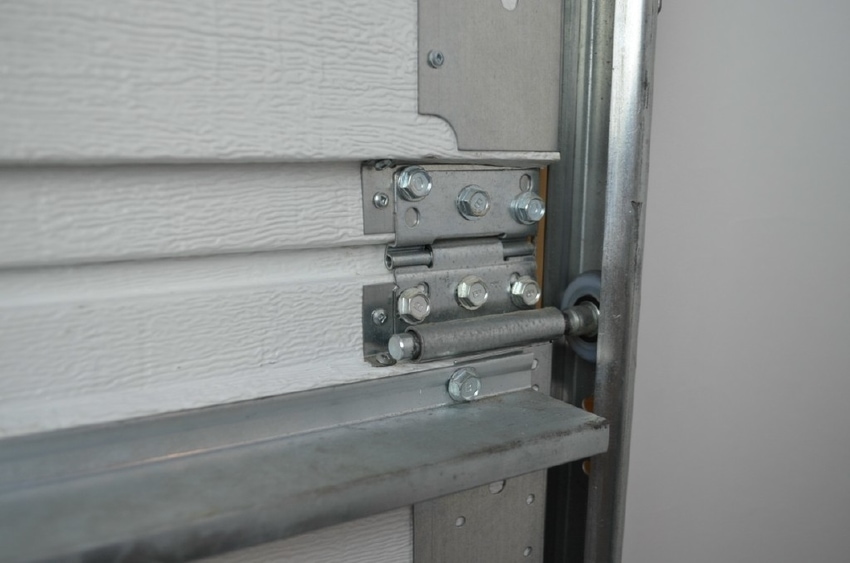
Should garage door springs fail, it can affect the way the door opens and put excessive force on the tracks, rollers, cables and more. Should the opener fail you’re back to opening and closing the door by hand. But among all the things that could go wrong, few people give much thought to the hinges. You know, those small metallic objects at the bottom and top of the panels that make it possible for the door to turn the corner from vertical to horizontal. Below, our Littleton garage door repair experts take a closer look at the most common problems that can befall your garage door springs and hinges, along with our recommended approaches for each.
Common Garage Door Hinge Problems and Solutions
There are a surprising number of things that can and do go wrong with garage door hinges. Let’s take a look at five of the most common problems we encounter on a regular basis.
Squeaky Hinges
We might as well start with the most common problem affecting garage door hinges. And that’s squeaky hinges. People are often aware of the sound of squeaky hinges but they mistake it for squeaky rollers.
Solution
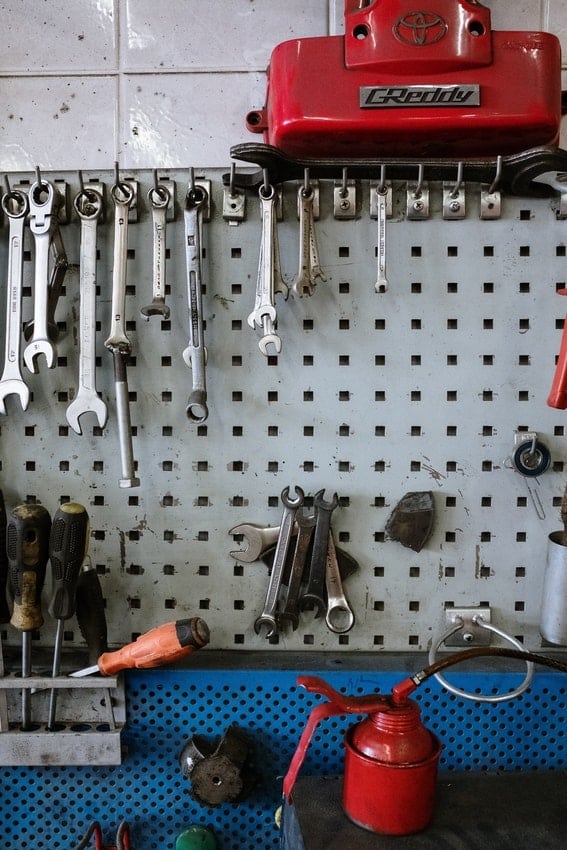
Fortunately, squeaky hinges is not just the most common type of garage door hinge problem, it’s also the easiest one to fix. All it takes is a little WD40 applied to the hinge and your squeaking problem will be history in a matter of minutes. If you need you can remove the pin and apply the lubricant directly to the pin. If you don’t have any WD-40 you can use petroleum jelly. Petroleum jelly has the added benefit of not creating a runny mess.
Stuck Hinge Pin
The stuck hinge pin is a common source of the squeaking we just discussed. But more than that it can impede smooth action of the door and put undue stress and strain on the motor and chain (or belt). If the door has been in place for 10 or 15 years or more stuck hinge pins actually become a pretty common problem.
Solution
One option is to remove the stuck hinge pins - but doing it yourself can be a major hassle. If you’ve tried to remove them but haven’t had any luck, your choices come down to A) replacing the entire hinge or B) calling the pros from A Better Garage Door. We’ll have someone there in a jiffy to set things right.
Loose Hinges
As hinges age, one of two things usually happens. Either they begin to corrode, swell up and get tight or they get loose and the door starts to rattle and roll as it rises and falls. There are several reasons why doors might begin to loosen up. For instance, in a place like Colorado where the temperature can be scorching hot in the summer and bitterly cold in the winter the metal in the hinges expands and contracts. Over the course of years, all that expanding and contracting can cause the hinges to loosen. Also, if the door was involved in some type of accident (say the car accidentally backed into it before it was completely open) this can result in the hinges coming loose. Finally, if any modifications were made to the door (say panels were replaced) the screws may not have been reset properly.
Solution
Thankfully, many loose hinges can be tightened yourself without professional assistance. However, if you’ve tried to tighten your hinges and the problems still persist, or you’d rather not get your hands dirty, we’d be happy to help. Call our local service team for low rates on same-day service appointments.
A Skewed Jamb
If the garage door jamb isn't level it can cause the entire door to rise and fall at an angle. Allowing the door to run while out of whack like this can put an enormous unnatural strain on the hinges. The hinges, remember, are the only thing holding the panels together. So if the force exerted on them is not straight up and down vertical then it’s going to create problems. The hinges themselves may warp, screws will come loose and more. The uneven forces will also create stress and strain on the rollers and tracks.
Solution
Some people would say that the only way to deal with this type of problem is to remove the door, level the jamb and then re-hang the door. But while there are certainly times when that might be the only option, you may be able to effectively address the problem in a less drastic way. If the jamb is less than about ½ inch out of level you may be able to correct the problem using a shim. If the jamb is more than ½ inch off though, you’ll likely need to remove the door and reset the jamb.
Broken Hinge
Perhaps the car made accidental contact with the door and broke a few hinges and panels as a result. Or maybe a branch fell and hit the door during a twister or a blizzard and broke some hinges. In either case, replacing garage door hinges is not typically a big deal.
Solution
Any reasonably competent do-it-yourselfer can replace garage door hinges pretty quickly. But if you don’t have the time or inclination, just call our repair team and we’ll send someone right over to set things right.
Garage door hinges are small, discrete parts of the door assembly. But it’s crucial that they’re always properly lubricated, securely fastened and operating effectively. Working on garage doors may seem intimidating for the average person, but adjusting garage springs is actually fairly routine. In fact, maintaining not just the springs, but all parts of the garage door can mean extending the life of your door and avoiding more costly problems down the road. Following some simple guidelines, any homeowner from Erie to Denver can feel more confident in maintaining their garage door springs.
Recognizing Your Garage Springs
On modern sectional garage doors, there are two main types of springs:
Torsion Springs
Torsion springs will be wrapped around a metal shaft located above, and running parallel to your garage door frame. There may be one or two of them, depending on the weight of the door. These are usually used for doors over 10 feet wide.
Side-Mounted or Extension-Mounted Springs
Just as they sound, side-mounted springs are mounted above the side tracks running into your garage on either side of the door mechanism. These have hooks that attach on one end to the track assembly, and on the other to a cable that acts in a pulley system. There will always be two side-mounted springs, one on each side.
It is important to note: As mentioned, torsion springs in particular are under an immense amount of tension. Homeowners should always exercise caution, wearing proper safety equipment and using proper lighting while working on garage doors. Homeowners in need of a full garage door replacement should consider hiring a professional to avoid danger of bodily harm.
Openers may also have an instruction manual which should be referred to first.
Are Your Garage Door Springs Broken?
To learn more about our garage door spring repair & replacement services, visit the page below.Broken Springs
Common Garage Door Spring Problems and Solutions
Common Garage Door Problems & Solutions
A properly functioning garage door relies on balanced tension. If your door isn't opening or closing as it should, adjusting the tension may help. Below are some common issues and their solutions:
| Problem | Suggested Solution |
|---|---|
| Door is not closing fully | Increase tension |
| Door is difficult to close | Increase tension |
| Door is opening too quickly | Increase tension |
| Door is difficult to open | Decrease tension |
| Door is closing too quickly | Decrease tension |
| Door is closing unevenly | Adjust tension only on the side where the gap is |
Tension should always be adjusted evenly on both sides unless the door is closing unevenly. If problems persist, consider consulting a professional to ensure safe and proper operation.
Basics of Torsion Spring Adjustment
- Prepare — All tools should be inside the garage unless there’s an alternate point of entry/exit. Door is unplugged (for electric openers) and down all the way. To ensure that the door stays in the down position, the C-clamp is placed on the garage door track above the bottom roller.
- It is important that the door stays down — The torsion spring must be under tension for it to be adjusted, and with the door in the down position it will be under a great amount of tension. As the spring is adjusted, the door can rise creating a dangerous situation. Please consult a professional if this is not a task you've done before or have been properly instructed on.
- The winding cone — At each end of the spring, there’s a winding cone which locks the spring in place. The cone has four holes, evenly spaced in an X around the cone. It also has two screws which hold the cone in place.
- Hold and loosen — A winding bar or metal rod is inserted in the bottom hole of the winding cone. While using the bar to hold the cone in place, the screws are loosened.
- Adjust — A second bar or rod is inserted into another adjustment hole either directly in front of or behind the first one. I.e. the rods should be next to each other, not across from each other.
- Rotate — Using the bars as leverage, the cone is rotated up (increase tension) or down (decrease tension) at 90 degree increments in the same amount on each side.
- Test and repeat — One 90 degree turn should be done at a time, testing the door and going through each step over again as needed.
Basics of Side-Mounted Spring Adjustment
- Prepare — For side-mounted springs the door must be fully open to make sure the tension on the spring is fully released. Electric openers must be unplugged and disconnected. The c-clamp can be used below the lowest door roller to hold it open.
- The spring hook is removed from the track hanger (nut holding hook in place is also removed).
- Adjust — The hook is moved to a higher hole to increase tension, or a lower hole to decrease tension.
- Test and repeat — Door is tested and steps are repeated each time.
Need a Hand in Broomfield? Call Our Garage Door Team!
While it is sometimes better to seek professional help in home repair, having an active role in minor maintenance can mean a better awareness of the health of your garage door. Adjusting garage springs and hinges is a simple but essential part aspect of maintaining your garage door and protecting your home investment. If you have any questions about the hinges or springs on your garage door in Broomfield, Parker or nearby communities, call the pros at A Better Garage Door to schedule a consultation. We’re here to help.